If you’re looking for a scanner to digitize your old 35mm film archives, you might be spending way more than you need to. An inexpensive digital camera setup can provide better quality scans than the popular and pricey (brand name removed) CoolScan 4000ED scanner.
The key element in a camera scanning setup is the lens. The 1/2.5 inch scanning lens is the ideal tool for this process. It has a huge depth of field, meaning that the entire film plane will be in focus at once. This is a particular advantage as film is often warped or has depth due to the emulsion layer itself. A lens that is excellent for this purpose is the Schneider Componon-S 50mm F/2.8.
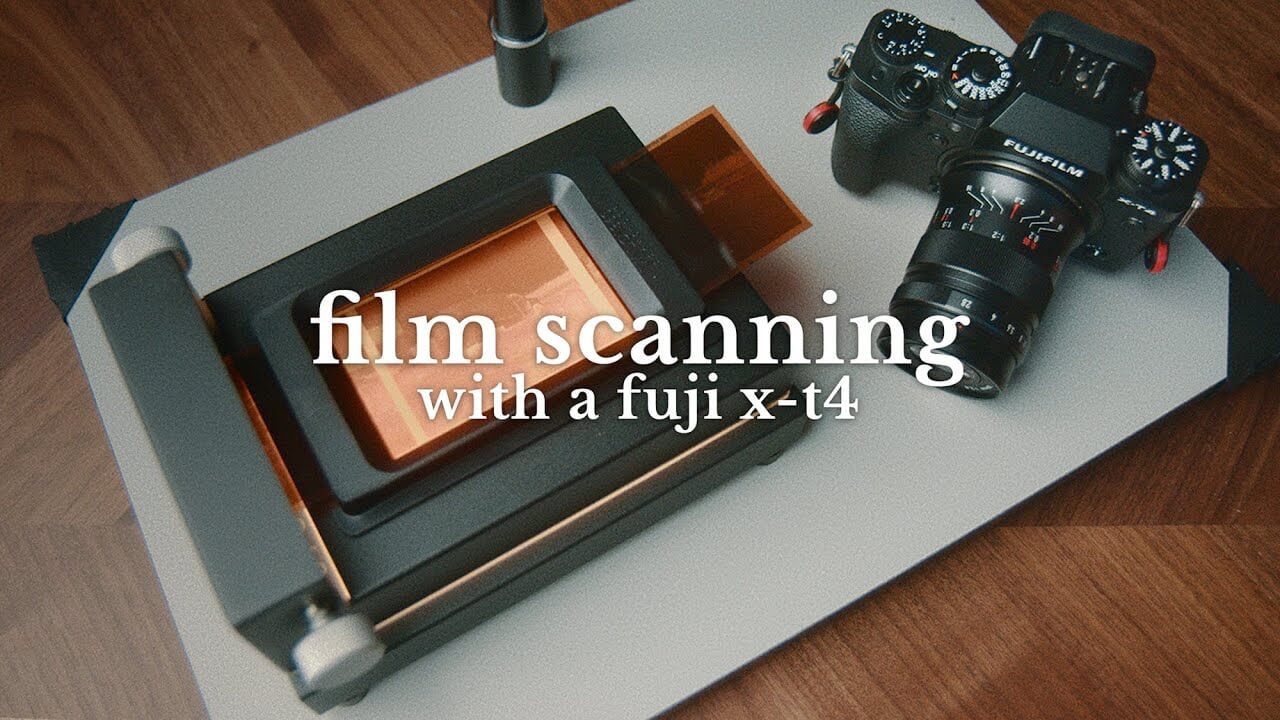
To set up your own camera scanning setup you’ll need a few things: a DSLR camera, a macro lens, film holder, and a light source. If you already own a DSLR camera, then you can get a lens adapter to connect the 1/2.5-inch scanning lens to your camera body.
The first step is to mount the lens and film holder on a Copy Stand, a tripod-like device that holds the camera directly over the film. A clamp mount with a clip holder is an inexpensive option if you don’t want to have to deal with a separate stand.
Next, you’ll need a light source to illuminate the film. A simple lightbox works great. If you don’t have one, you can make one on your own with a box, a plastic diffusion sheet, and an LED light. The lightbox is placed underneath the film holder, while the camera responds from above.
When it comes to settings, a few things you need to keep in mind. Firstly, make sure your camera is set to its highest resolution and quality settings. You should be setting it to capture in RAW format. Secondly, the ISO should be set to the lowest possible value to avoid introducing any noise into your images. Lastly, ensure that the camera is set to manual focus.
Once everything is configured, you’re ready to start scanning. Place a slide or strip of film into the holder, then center it over the lightbox. Position the camera over the film; use the macro lens and adjust the focusing ring manually. Take several photos and adjust the camera settings as required to get sharp images.
Once you have your photos, it’s time to transfer them to your computer, and perform any post-processing. Since you’ve captured your scans in RAW format, you’ll have plenty of flexibility when adjusting the exposure, color balance and contrast. Then, when you’re done with editing, you can convert the files to JPEG for sharing or viewing.
In conclusion, if you’re looking to digitize your film archive with good quality scans while keeping the costs down, then creating a digital camera scanning setup could be the way to go. With a little investment in equipment and time, you can produce impressive results, and in some cases, save yourself a lot of money. Using a 1/2.5-inch scanning lens like the Componon-S 50mm F/2.8 can help you achieve excellent results. Just follow the steps above and you’ll be able to see your old film negatives in a new light.
Keywords: 1/2.5 Inch Scanning Lens, Camera Scanning Setup, CoolScan 4000ED, Digital Camera Scanning, Film Community, Film Holder, Light Source, Macro Lens, RAW Format, Scanning 35mm Film, Schneider Componon-S 50mm F/2.8, Slide Film Holder.